Must Do’s Before Your Team Can Use Vera Engage
- Enable Installation of the Word add-in
- Make sure users are provisioned
- Set up integrations
- Confirm that every user has:
- Activated their account from the welcome email, or that SSO is live and they have been provisioned
- Installed the Word add-in
- Logged in successfully to both the web app and the add-in
Must Dos
- Enable the installation of the Word add-in
- Provision users manually or with SSO
- Set up desired Icertis connections
- Roll out any additional instructions to users and ensure they can use both the Word add-in and web app.
Activate account
Every user has activated their PropelAuth account, or SSO is live.
Install the add-in
The Word add-in is installed from Microsoft AppSource.
Verify sign-in
Users have logged in successfully to both the web app and the add-in.
Signing in and finding your profile menu
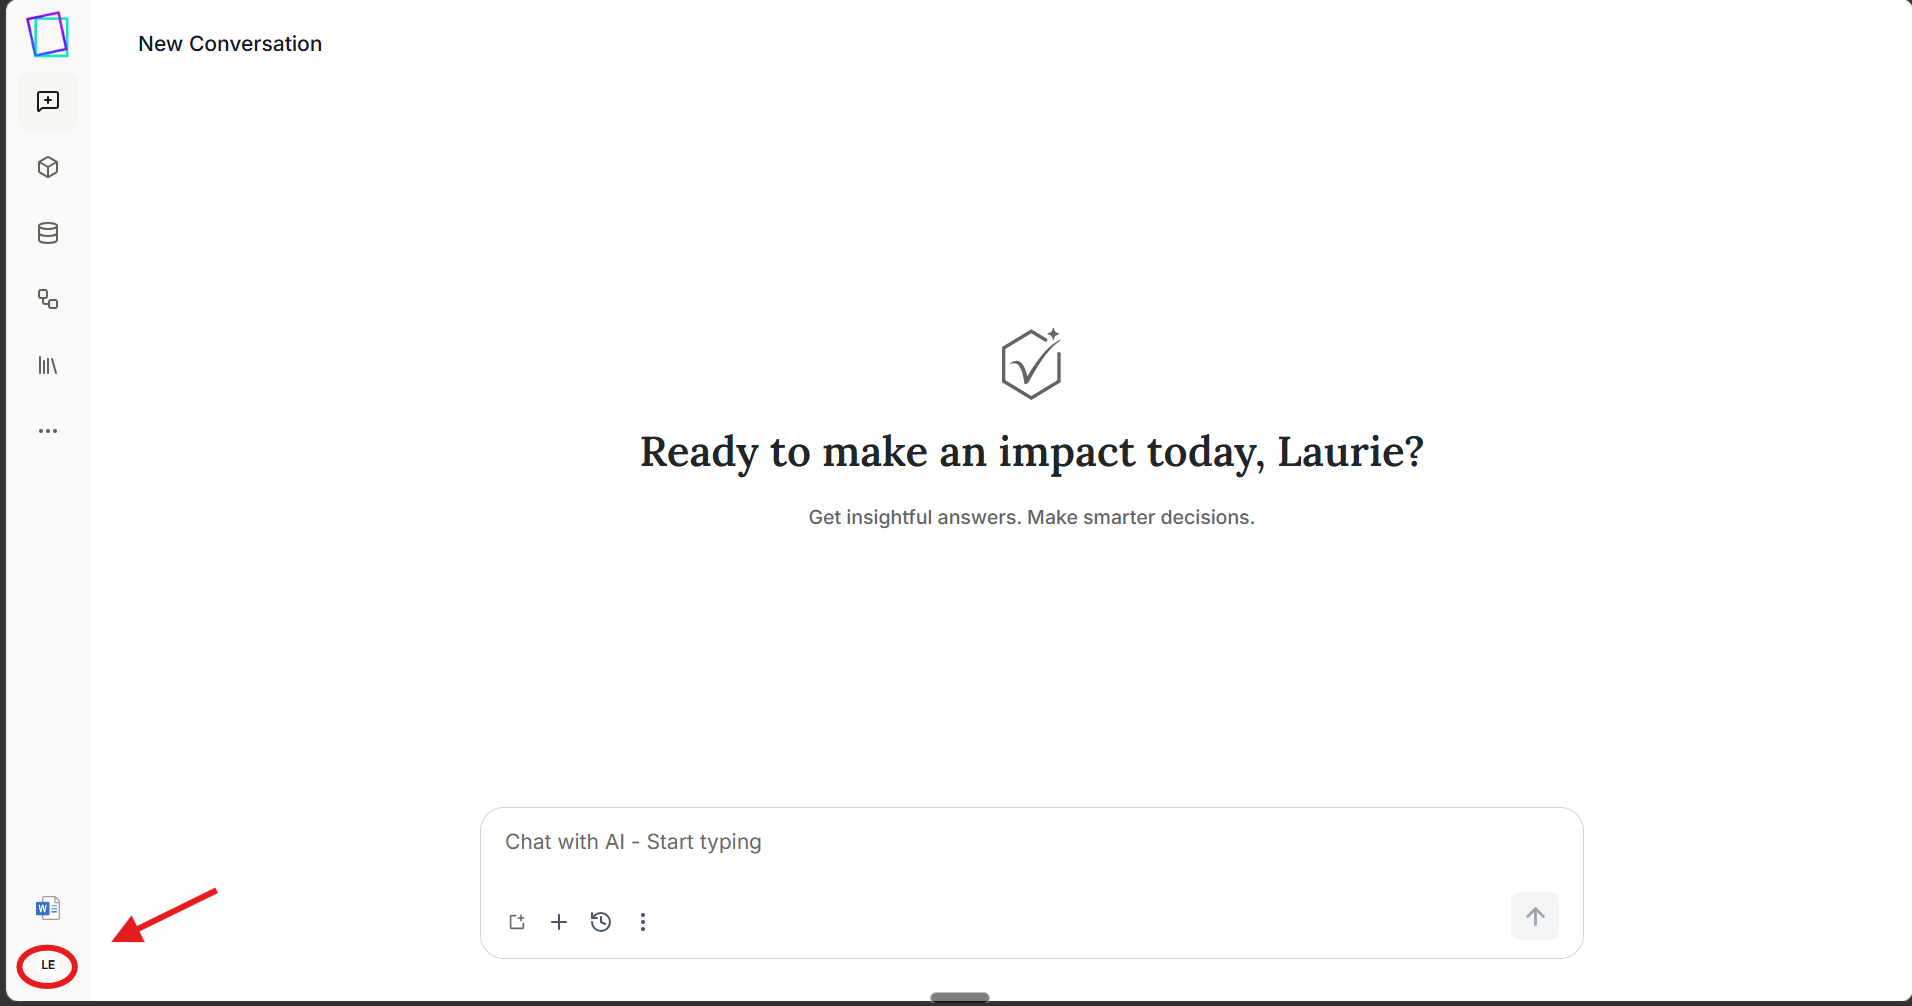
The steps below are referenced throughout this page whenever you need to reach your profile menu.- Navigate to the Vera Engage web-app and log in with your credentials.
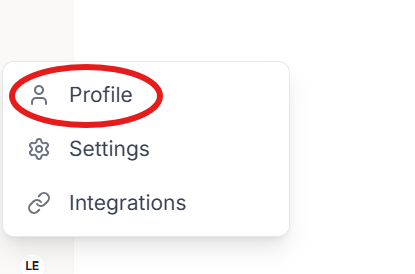
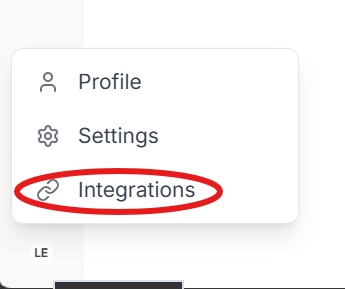
- Click on your profile initials in the lower lefthand corner of the screen, then select Profile to manage users and SSO, or Integrations to connect Icertis, SharePoint, or web search.
Install the Vera Engage Word Add-in
Install from the Microsoft Marketplace (recommended)
Install from the Microsoft Marketplace (recommended)
The easiest way to install the Vera Engage Word Add-in is directly from the Microsoft AppSource marketplace.
1
Open the Microsoft Marketplace listing
Go to the Vera Engage listing on Microsoft AppSource.
2
Get the add-in
Select Get it now and follow the prompts to sign in with your Microsoft account and add Vera Engage to your Office apps.
3
Open the add-in in Word
Open Microsoft Word, go to the Home or Insert tab, and select Vera Engage from the ribbon to launch the add-in. Depending on the build your organization has, the ribbon button and task pane may still read Dioptra - that is the same add-in, not the wrong one.
Manually install via manifest file
Manually install via manifest file
The Vera Engage Word Add-in can be manually installed with a manifest file provided by the Vera Engage team - reach out to your Icertis contact to request. Below is a summary of what will need to be done to do this.
High-level overview
High-level overview
- Download and prepare the manifest files.
- Add the manifest files to the Microsoft Word Trust Center.
- Enable the Add-in.
Download and prepare manifest files
Download and prepare manifest files
- Download the Add-in manifest file for Word.
- Open Windows File Explorer.
- Create a new file folder on your local computer.
The folder name must not contain any spaces for the add-in to display in the folder. For example, use
sharedfolder, not shared folder.- Place the downloaded manifest in the newly created folder.
- Right-click the folder you created and select Properties.
- In the dialog that displays, select the Sharing tab of the dialog.
- Select Share to display the Network access dialog.
- In the dialog, add yourself and any other users or groups you want to share your add-in with.
You must have at least Read/Write permission to view the folder.
- After you have added the desired recipients, select Share. This should display a confirmation that the folder is shared.
- From the sharing confirmation, note the full network path that displays immediately after the folder name. You can right-click to copy it. You need to enter this value as the Catalog URL in the next task.
- Select Done to close the Network access dialog.
- Close the Properties dialog.
Add the Manifest to the Trust Center
Add the Manifest to the Trust Center
- Open Microsoft Word.
- Select File in the ribbon at the top of the app.
- Select Options.
- Select Trust Center.
- Select Trust Center Settings.
- Select Trusted Add-in Catalogs.
- In the Catalog URL field, paste the full network path to the folder that you shared in the previous task.
- Select Add catalog.
- Select the Show in Menu checkbox for the item you added.
- Select OK to close the Trust Center dialog.
- Restart the Office app.
Enable the add-in
Enable the add-in
- In Microsoft Word, go to the Insert tab in the ribbon at the top of the window and select My Add-ins.
- In the dialog that displays, select Shared Folder.
- Select Vera Engage.
- Select Add.
Provisioning Users
Users can be provisioned manually or through SSO.Manual user provisioning
Manual user provisioning
Invite users individually and assign their roles from the Users page.
- Sign in and open your profile menu, then select Profile.
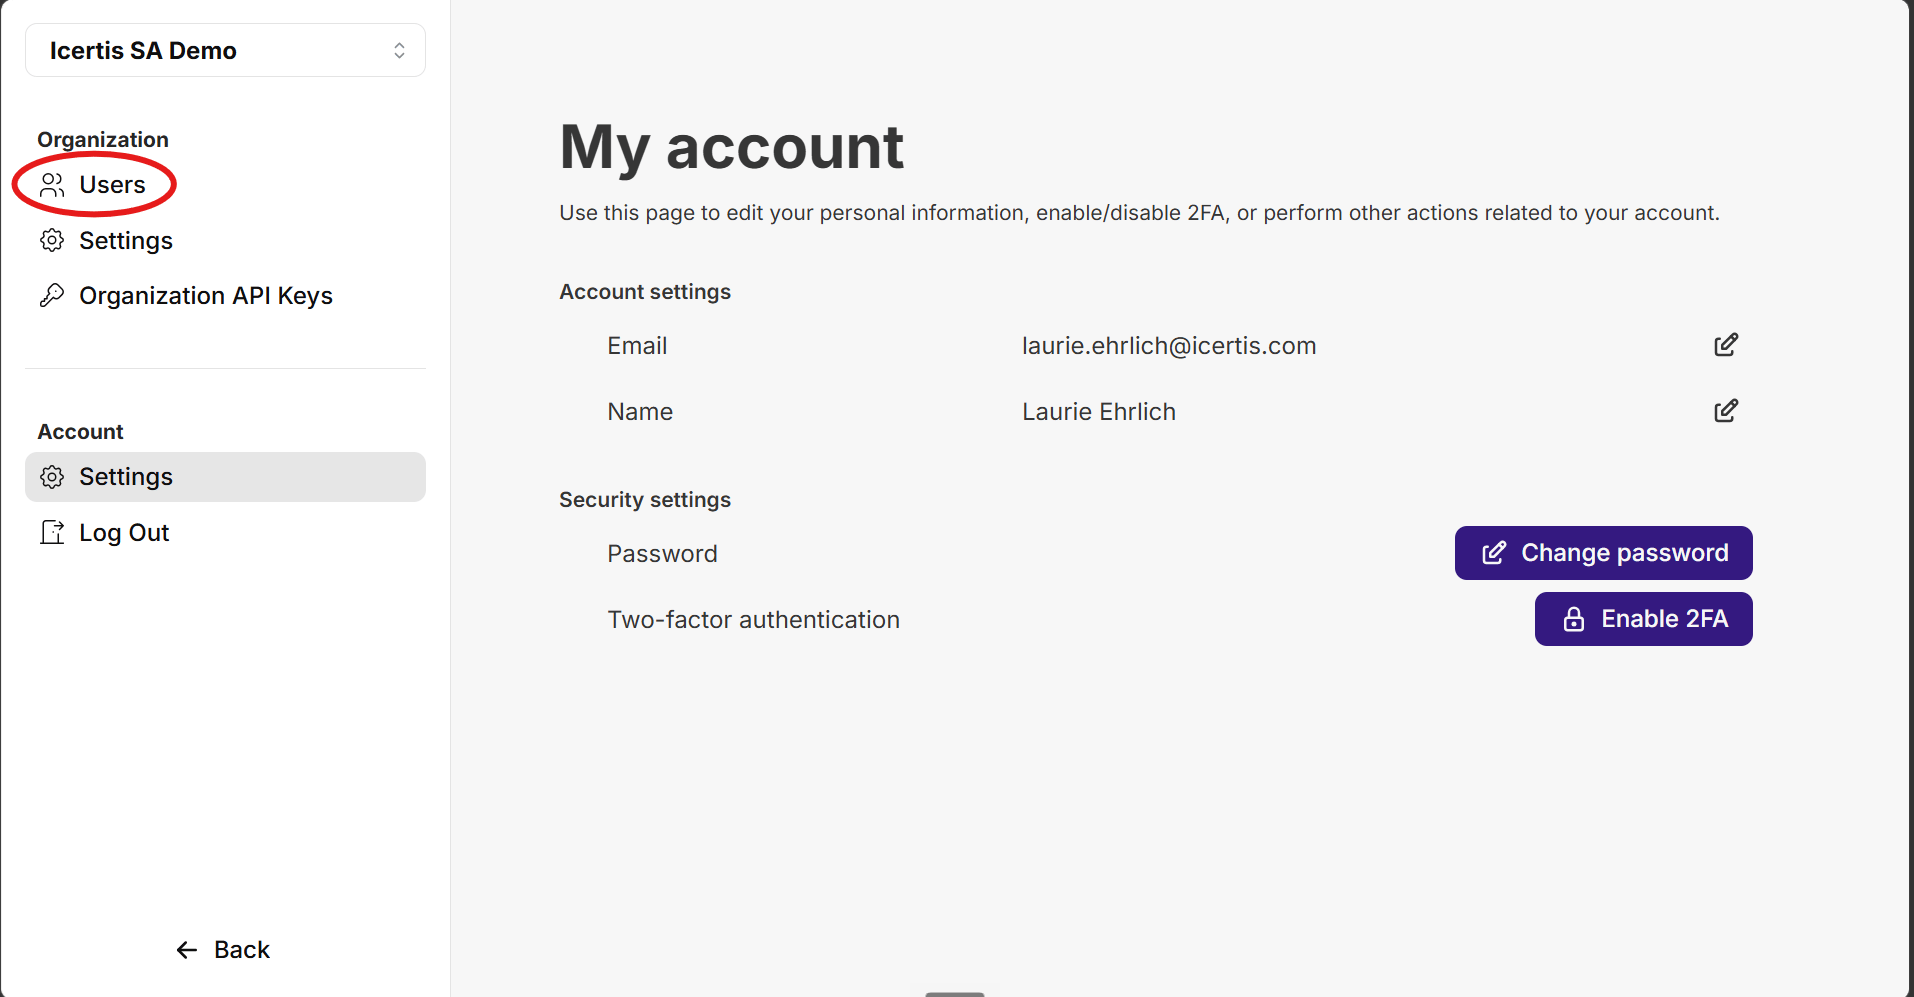
- From the Profile page, select Users under Organization in the left navigation.
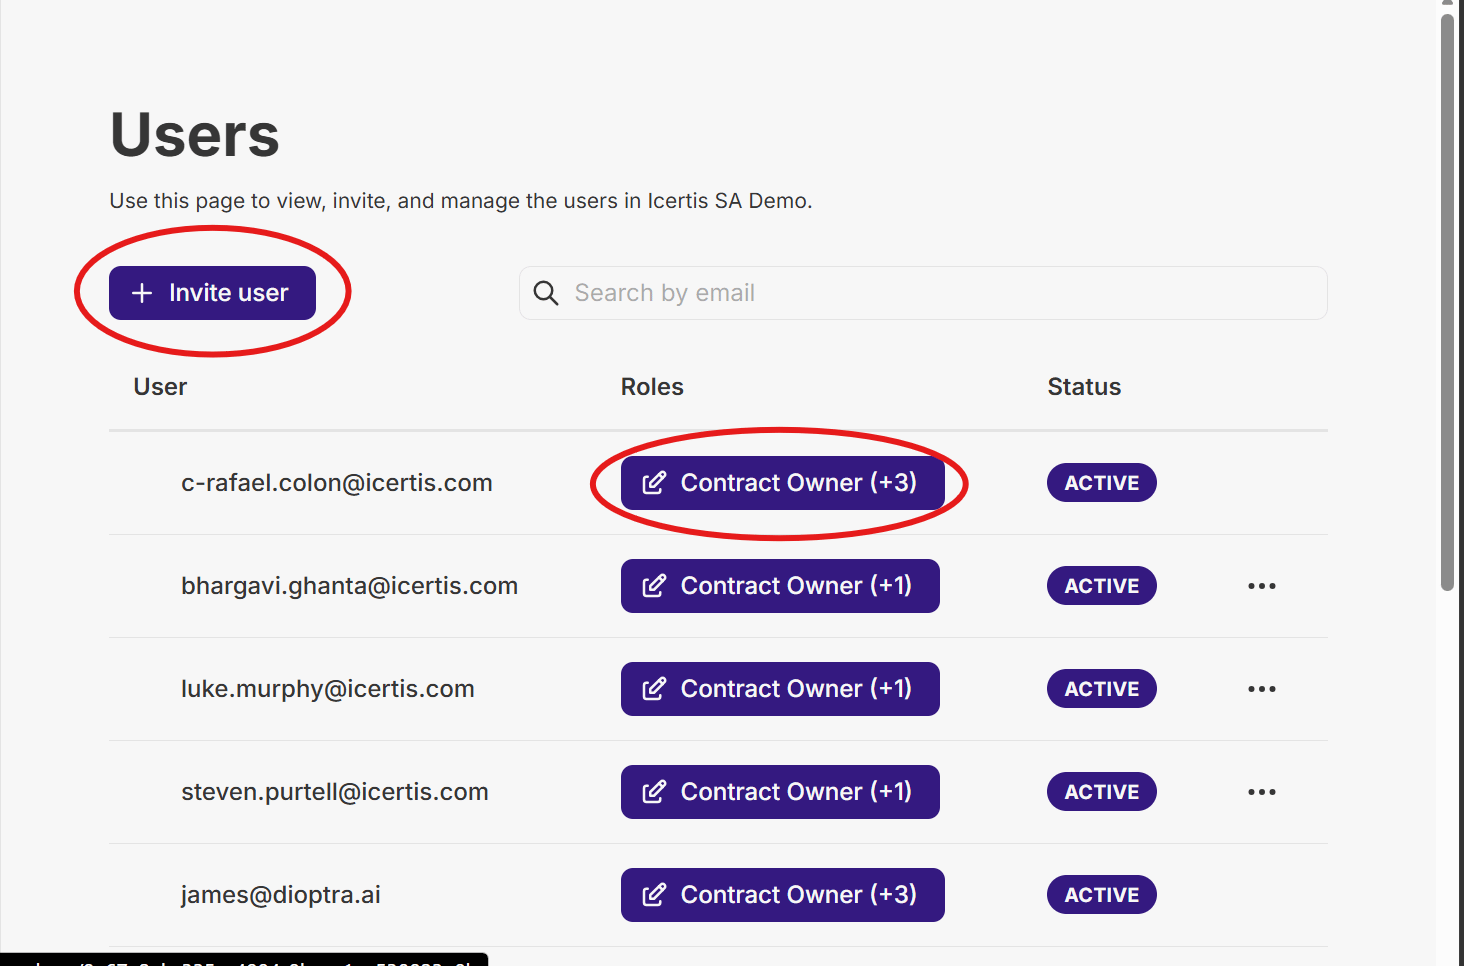
- Click + Invite user to send an invitation, or click a user’s role button to edit their assigned roles.
SSO Instructions
SSO Instructions
Vera Engage can connect with your organization’s existing SSO provider to provide a seamless sign-in experience.NOTES
- This process will need to be completed by a company SSO admin who has access to your Identity Provider (IDP) and has been provisioned with a Vera Engage admin account.
- SSO setup for ICI will not work with Vera Engage. Customers will need to separately set up SSO for both ICI and Vera Engage.
- Inform the Vera Engage Icertis team that you want to enable SSO.
- Sign in and open your profile menu, then select Profile.
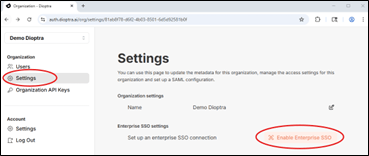
- From the Profile page, select “Settings” under “Organization” and then select “Enable Enterprise SSO”.
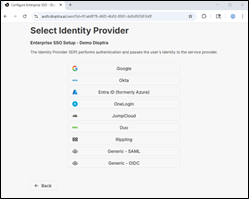
- Select your applicable Identity Provider (IDP) from the list, select SAML or OIDC, then follow the step-by-step instructions to set up SSO with your particular IDP. The steps are different for each IDP and are set-forth within the web-app.
- Additional documentation from PropelAuth is available here: https://docs.propelauth.com/overview/misc/saml-setup-guide-example.
Choosing the right "User Type"
Choosing the right "User Type"
There are 4 available user roles:
- User (currently called Contract Owner) - the default user role. User can use all of the Vera Engage user functionality.
- Publisher (currently called Playbook Owner) - Can use all of the Vera Engage user functionality and can also Publish playbooks for use by users.
- Organization Owner - All publisher rights and can see all shared objects across the team.
- IT Admin (currently called Org Admin) - can manage users and set up SSO and integrations.
Integrations
Vera Engage can connect with your existing systems to send and receive contracts and contract data and can be enabled to access the internet directly. If you require assistance with configuring an integration, please reach out to a member of the Vera Engage team directly. Integration options include:Icertis
Icertis
Standard Platform IntegrationICI Steps: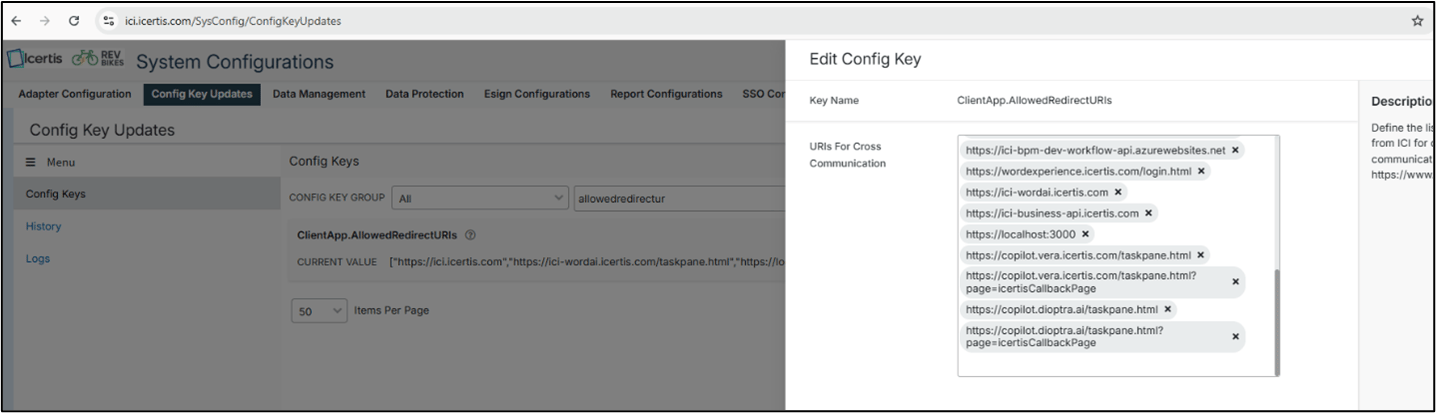
- Add the four URLs listed below to the “AllowedRedirectURIs” Config Key in the applicable ICI instance. Each URL should be added separately and in addition to any pre-existing URLs.
- https://copilot.vera.icertis.com/taskpane.html
- https://copilot.vera.icertis.com/taskpane.html?page=icertisCallbackPage
- https://copilot.dioptra.ai/taskpane.html
- https://copilot.dioptra.ai/taskpane.html?page=icertisCallbackPage
- https://app.dioptra.ai/auth/icertis-callback
- https://app.cust-staging-us.vera.icertis.com/auth/icertis-callback
- https://app.cust-staging-eu.vera.icertis.com/auth/icertis-callback
- https://app.cust-prod-us.vera.icertis.com/auth/icertis-callback
- https://app.cust-prod-eu.vera.icertis.com/auth/icertis-callback
- Save update and push for approval / publishing.
- The approver approves and clicks on “Push Changes to Icertis Platform”.
- Once published, proceed to Vera Engage Steps.
- Sign in and open your profile menu, then select Integrations.
- From the integrations page, select “Icertis”.
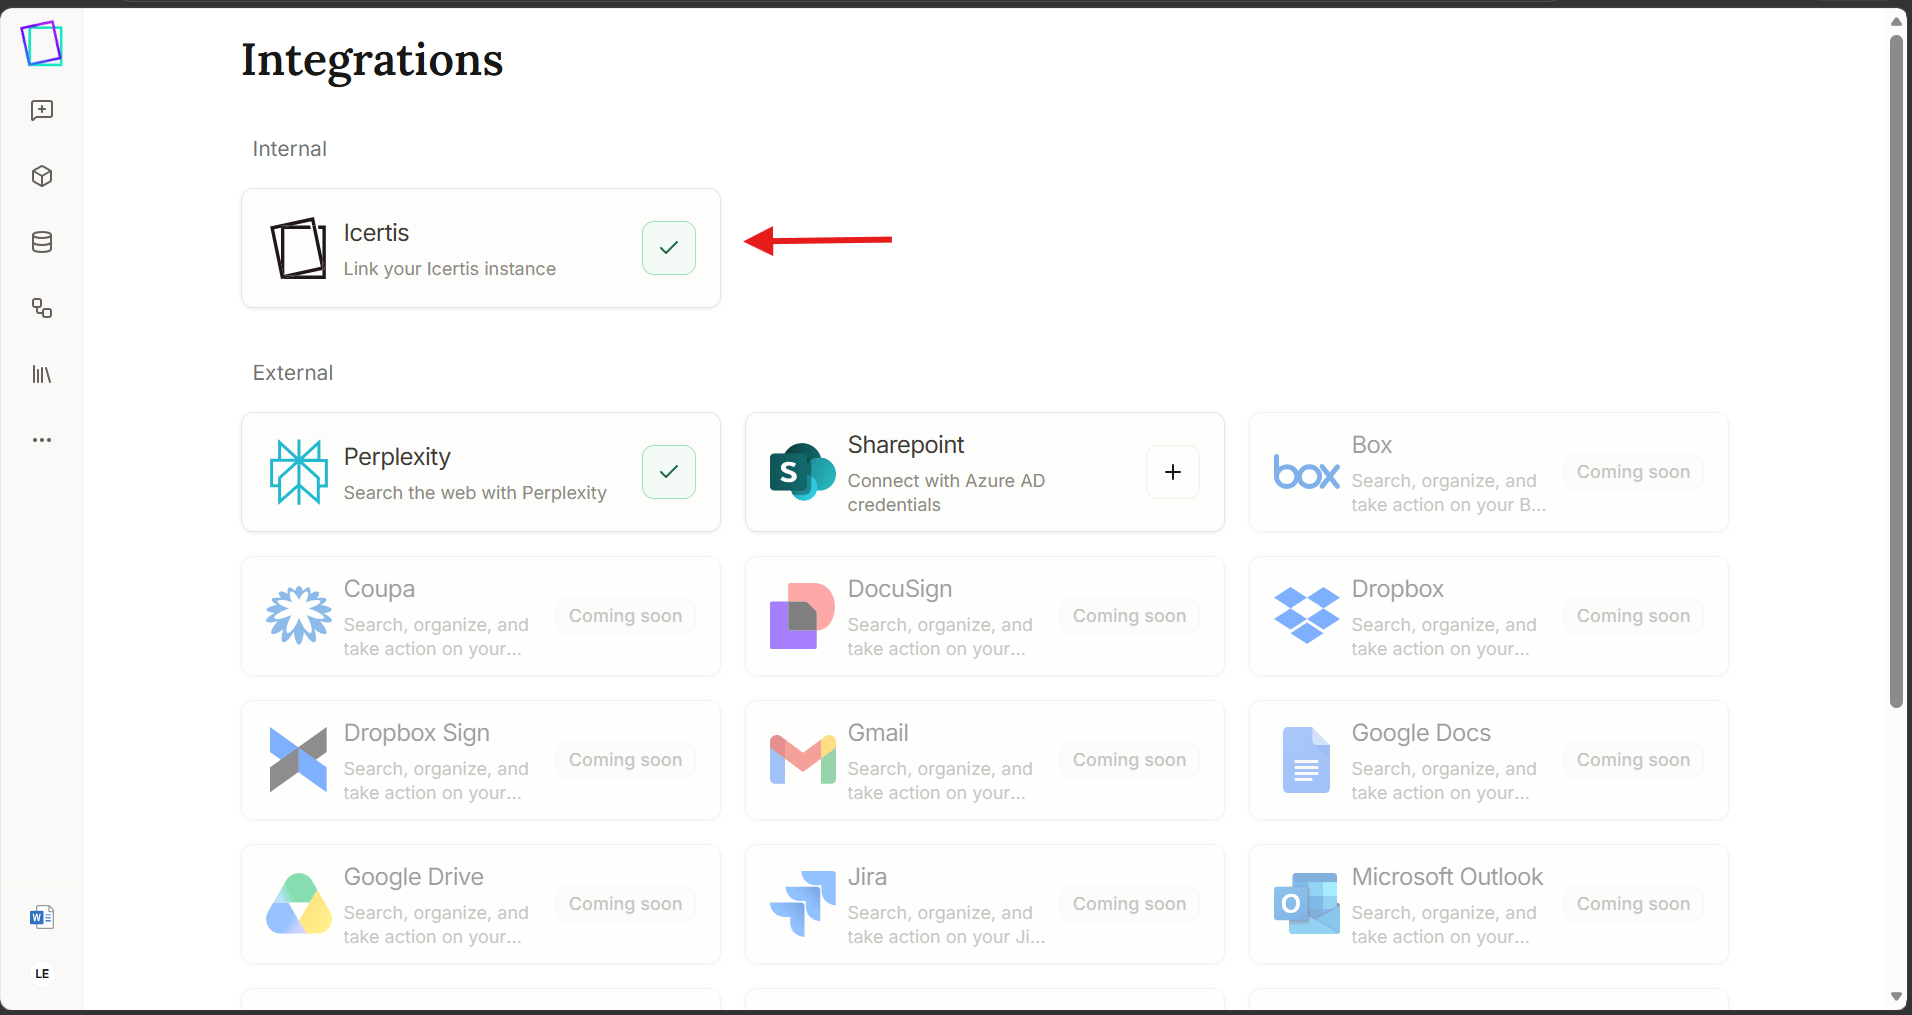
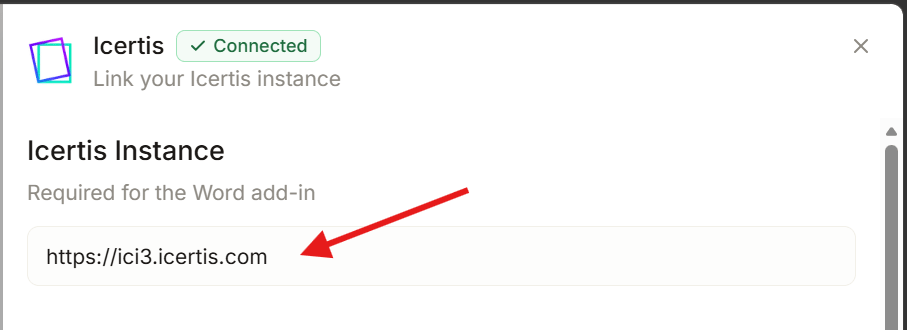
- Add the base url of the Icertis platform instance (ICI) you want to connect. This defines the ICI backend for users.
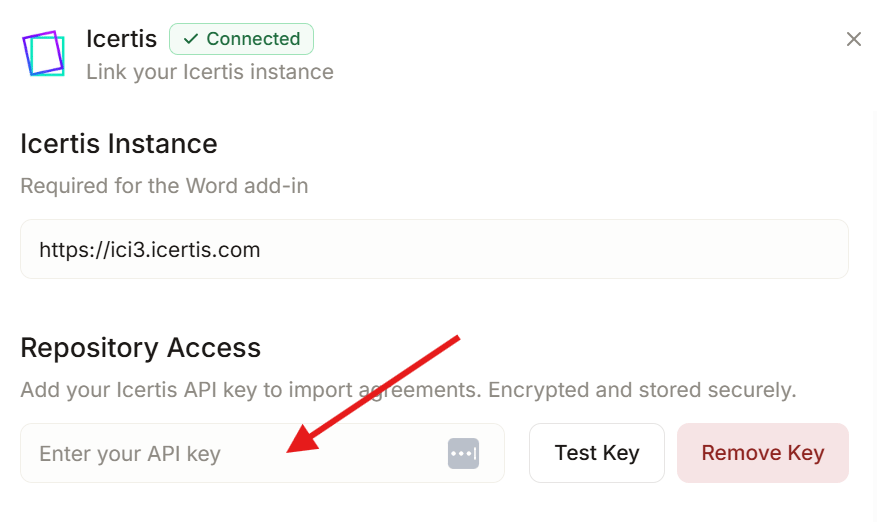
- A user with full repository access needs to generate the repository API key. Instructions are here: https://help.icertis.com/login/?redirectUrl=docs/develop/api-auth/api-authentication-options/#authkey
- Follow the above Vera Engage steps 1-2.
- Paste your API key into the Repository Access field, then click Test Key to validate.
Vera Engage can connect to your SharePoint tenant using Azure AD credentials so users can access SharePoint content directly from the add-in.Vera Engage Steps:
- Sign in and open your profile menu, then select Integrations.
- From the integrations page, select “Sharepoint”.
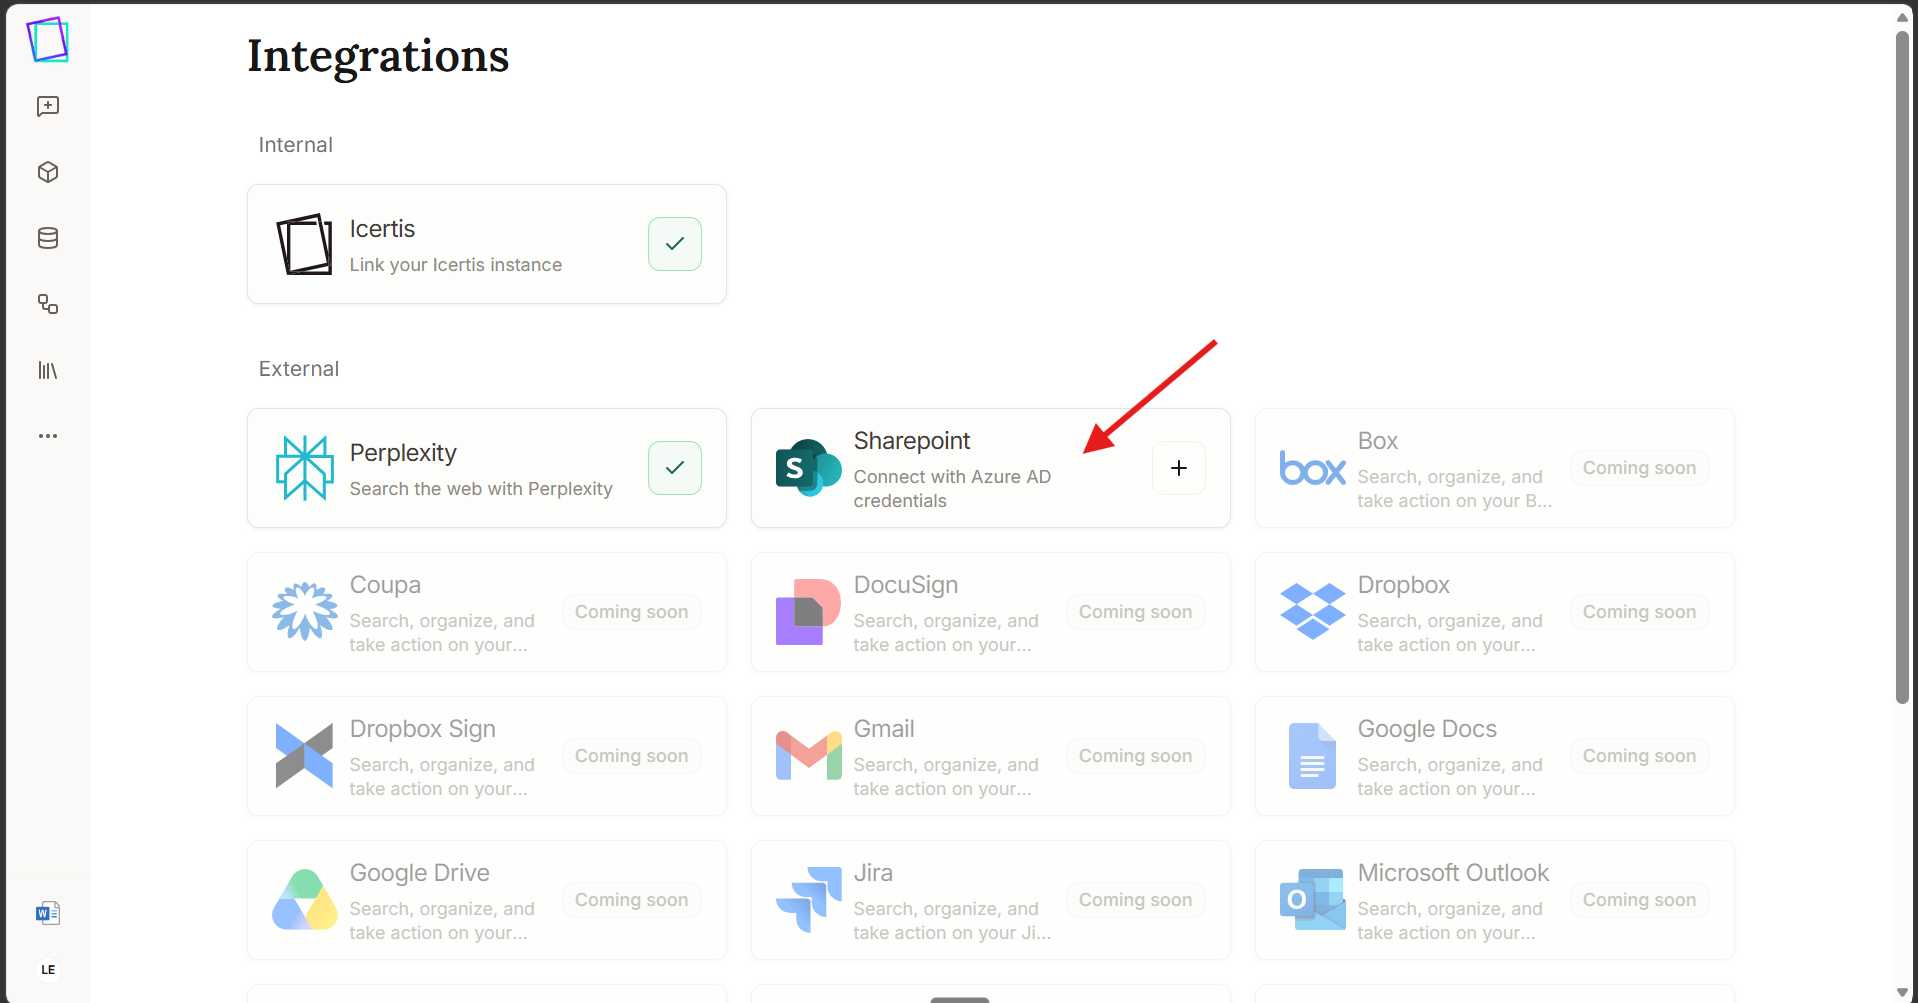
- Click Setup instructions for detailed instructions on how to complete the setup fields with values from your Azure AD app registration and SharePoint tenant.
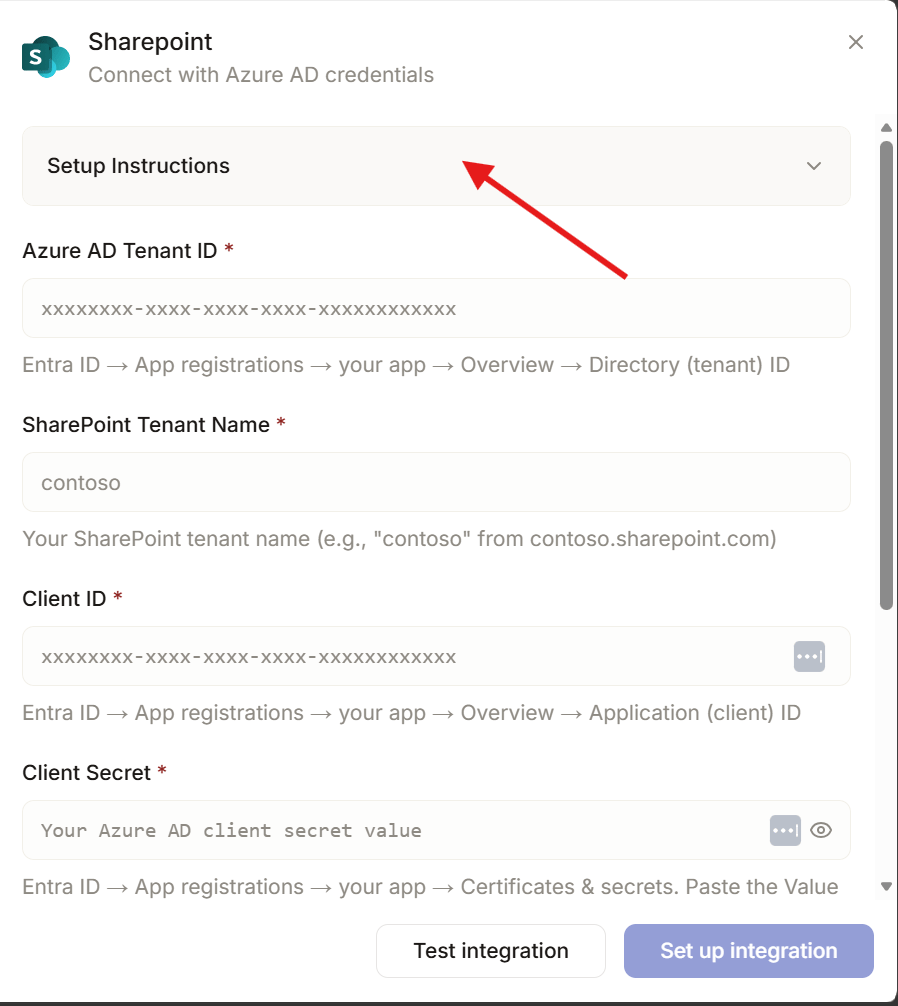
- When your set up is complete, click Test integration to make sure there are no errors. When everything is working, click Set up integration.
Web search
Web search
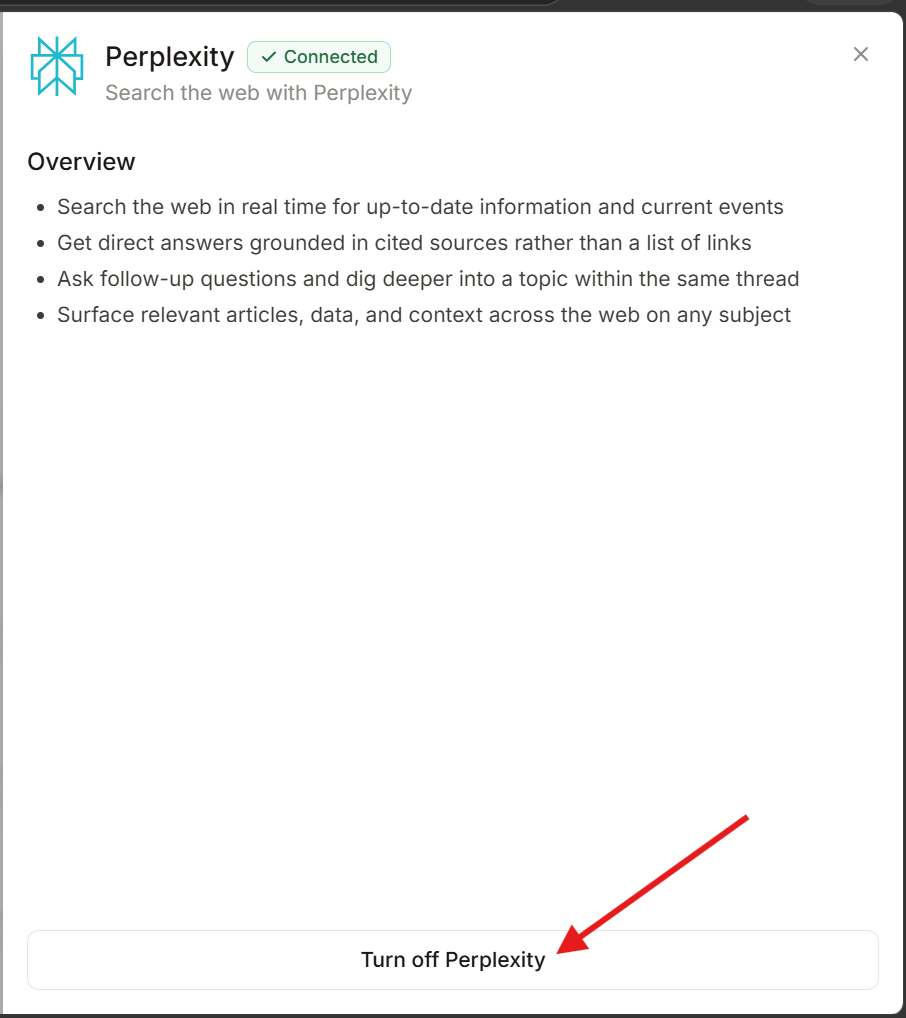
Vera Engage can be enabled to search the web directly through Perplexity, giving users real-time information alongside their contract work.Overview
- Search the web in real time for up-to-date information and current events.
- Get direct answers grounded in cited sources rather than a list of links.
- Ask follow-up questions and dig deeper into a topic within the same thread.
- Surface relevant articles, data, and context across the web on any subject.
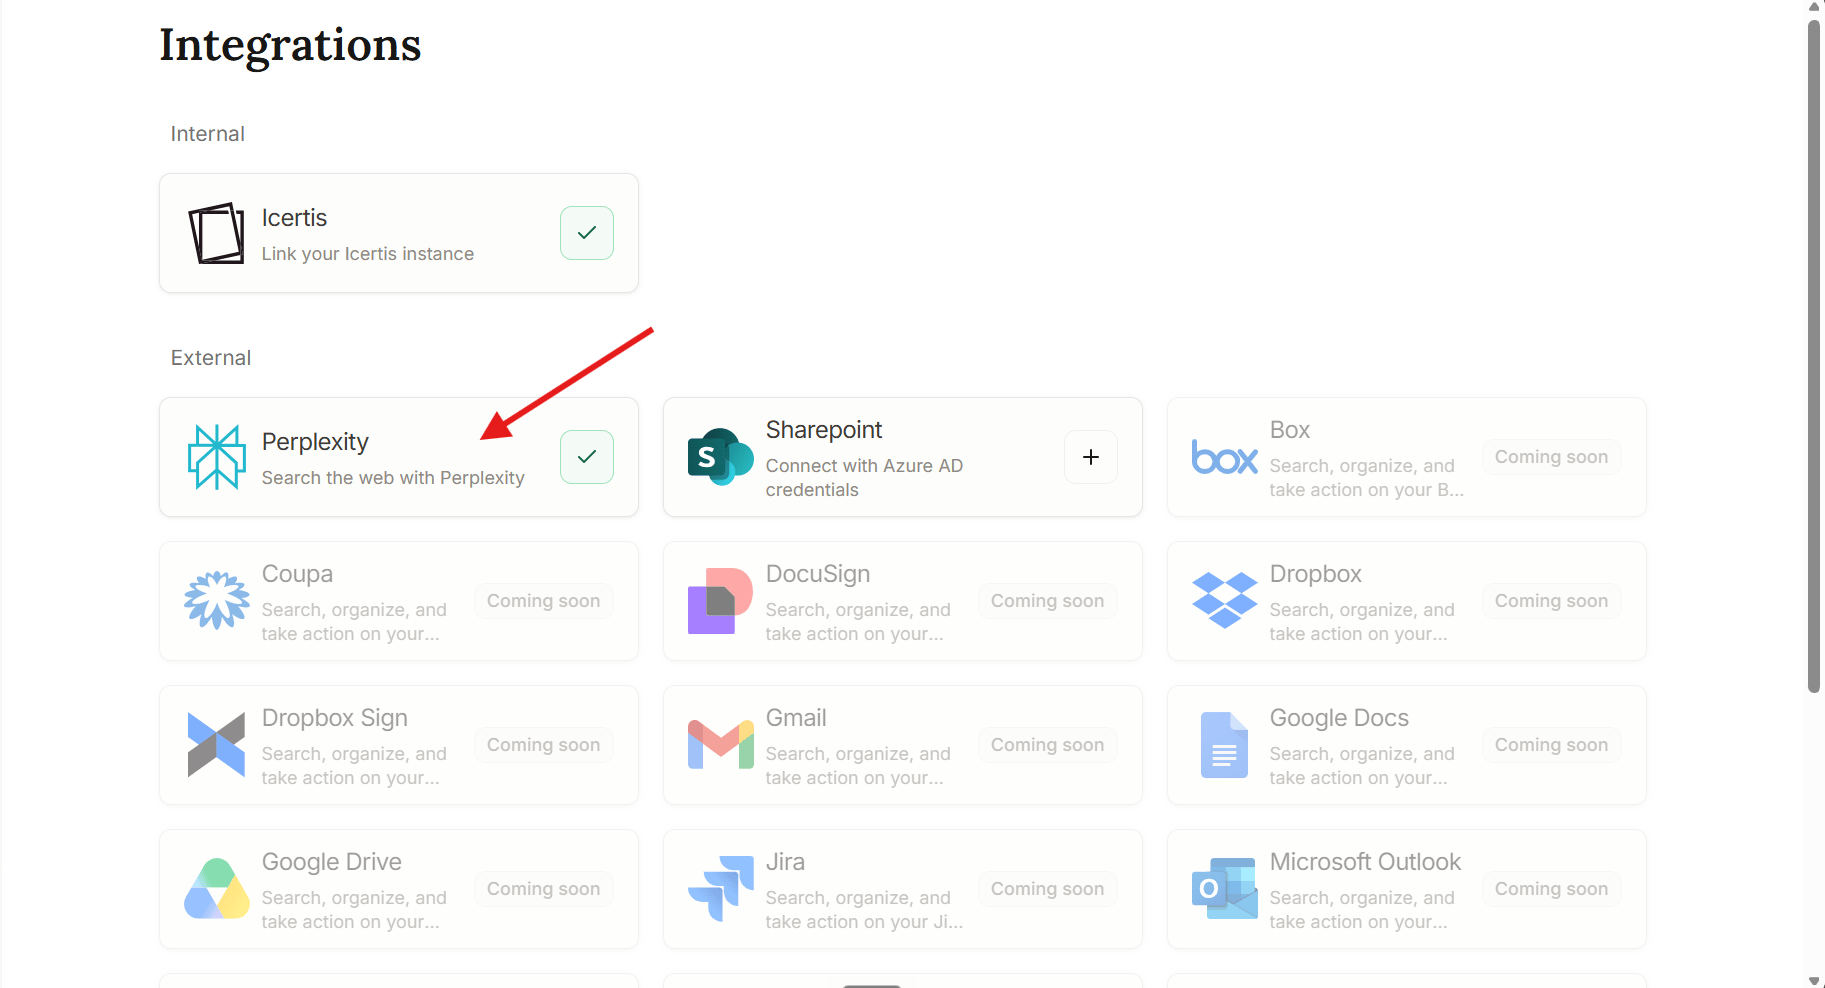
- Sign in and open your profile menu, then select Integrations.
-
From the integrations page, select “Perplexity”.
-
To disable it, click Turn off Perplexity at the bottom of the panel.