
Creating a workspace
1
Click New Workspace
From the web app, go to Chat and click New Workspace.
2
Name it
Give it a short, unique name (for example,
SaaS Playbook or Acme diligence) and a description. If several teams create workspaces, agree on a naming convention so they stay easy to find.3
Add your materials
Attach the files the agent should work from. For a playbook, these are the files you would give a new joiner: standard forms, existing playbooks or checklists, and example redlines.
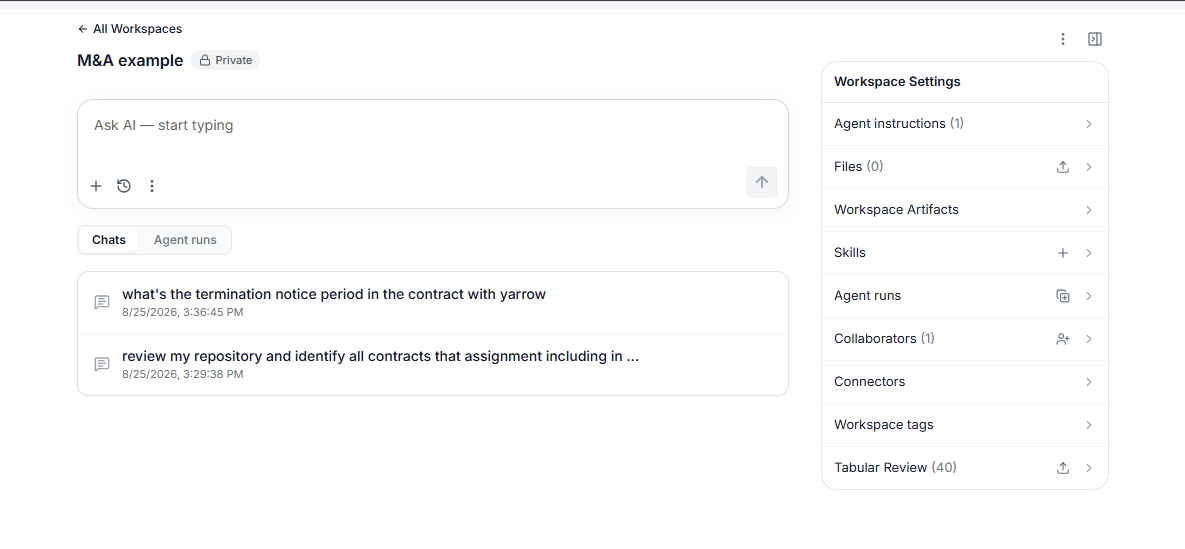
Workspace settings
The settings panel on the right of a workspace holds everything the workspace knows and everyone who can see it.Chats and agent runs
A workspace keeps two lists side by side:- Chats - every conversation in the workspace, with its date and time. Click any conversation to reopen it and continue.
- Agent runs - playbook and agent runs, tracked separately so a long-running job does not get lost among your conversations.
Sharing a workspace
A new workspace is Private until you share it. Share with your entire organization or with named individuals, and choose the role for each person:- Editors can modify the workspace materials and, for a playbook, the rules.
- Viewers can run the playbook and ask questions of it, but cannot change it.
Artifacts in a workspace
Documents and tables created in a workspace conversation are saved as conversation artifacts. Promote an artifact to a workspace artifact to make it available across every conversation in the workspace and to everyone you have shared it with. A completed playbook rule table is a workspace artifact. Click the three-dot menu on any artifact and select Promote to Workspace.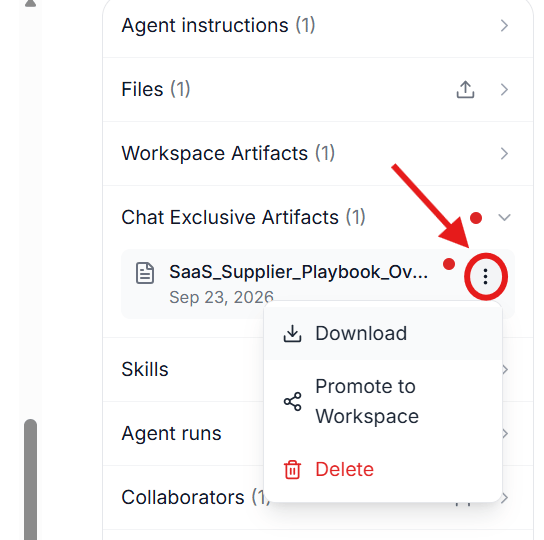
If a playbook will not run, see Troubleshooting for how to check and fix the workspace artifact.